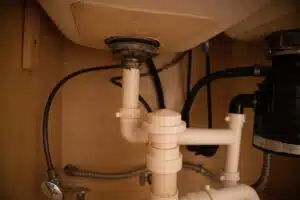
Dealing with a leaky sink in San Diego, CA, can be a daunting task, but fear not, because P Trap replacement is a straightforward solution that can save the day. This process involves removing old components, ensuring new parts match in size, aligning slip joints properly, and tightening everything to perfection. It’s a task that, when done correctly, can prevent future leaks and extend the lifespan of your plumbing system. Whether you’re in the heart of San Diego or the scenic surroundings of La Jolla, CA, this guide is designed to help homeowners tackle this project with confidence.
The first step in successful P Trap replacement is to carefully remove the old parts. This requires patience and a gentle touch to avoid damaging your plumbing. It’s a crucial stage where attention to detail matters, ensuring that the transition to new components is seamless. Residents of La Jolla and San Diego understand the importance of maintaining their homes to avoid plumbing emergencies.
Next, matching the sizes of your new P Trap to the old one is essential. This might seem like a simple task, but it’s where many DIY enthusiasts make mistakes. A mismatch in size can lead to leaks, so taking accurate measurements before purchasing your replacement parts is vital. This step ensures a snug fit and a leak-free installation.
Aligning slip joints correctly is another critical aspect of P Trap replacement. This ensures a secure connection between the trap and the rest of your plumbing. Proper alignment prevents potential leaks, making it a step that cannot be overlooked. Finally, tightening everything correctly is the key to a successful P Trap replacement. This doesn’t mean over-tightening, as that can cause cracks, but ensuring each component is snug and secure. After installation, conducting a leak test is crucial to confirm the success of your P Trap replacement. This final step gives homeowners in San Diego and La Jolla the peace of mind that their efforts have paid off, ensuring a leak-free sink and a well-maintained plumbing system.
Identifying the Need for P Trap Replacement
Identifying the need for a P Trap replacement begins with spotting signs of wear or damage under your sink. In San Diego, CA, frequent use and the area’s unique water quality can accelerate the wear of plumbing components. If you notice water pooling or an unpleasant odor emanating from under the sink, it’s likely time for a new P Trap. These signs indicate that the integrity of your current setup is compromised, necessitating immediate attention.
Once you’ve determined a replacement is necessary, the next step involves a careful examination of your current P Trap’s condition. Residents of La Jolla, CA, often find that corrosion or physical damage is the culprit behind leaks. Inspecting for cracks, rust, or any signs of deterioration can help you understand the extent of the issue. This inspection is crucial for ensuring that a replacement is indeed the solution to your problem.
After confirming the need for a P Trap replacement, preparing for the task is essential. This preparation includes gathering the right tools and purchasing a new P Trap that matches your system’s specifications. San Diego homeowners should remember to measure their current P Trap’s dimensions accurately to avoid buying the wrong size. Having everything you need on hand before starting the job can save time and prevent frustration.
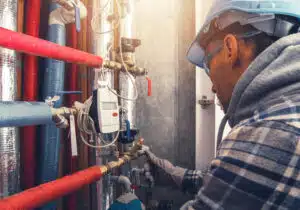
Lastly, understanding when to seek professional help is key to a successful P Trap replacement. While many in La Jolla, CA, feel comfortable tackling this project on their own, some situations call for expert intervention. If you encounter complex plumbing configurations or feel unsure about the replacement process, contacting a professional can ensure the job is done right. This approach not only secures a leak-free installation but also protects your home from potential water damage.
Tools and Materials for P Trap Replacement
Embarking on a P Trap replacement in your San Diego home requires gathering the right tools and materials to ensure a smooth process. A wrench, plumber’s tape, and a bucket are essential for removing the old P Trap and managing any residual water. Additionally, having a measuring tape on hand is crucial for verifying the dimensions of your new P Trap, ensuring it matches your system’s requirements. This preparation sets the stage for a successful installation, preventing unnecessary delays.
Once you have your tools ready, selecting the correct P Trap is the next step. Home improvement stores in La Jolla, CA, offer a variety of P Trap sizes and materials, such as PVC or metal, to match your plumbing needs. It’s important to choose a P Trap that not only fits the size but also suits the material compatibility with your existing plumbing. This careful selection helps avoid leaks and ensures a durable connection under your sink.
Before starting the replacement, laying out your tools and the new P Trap components ensures everything is within reach. This organization streamlines the installation process, allowing for a more efficient and less stressful experience. It also minimizes the risk of forgetting a crucial step, such as applying plumber’s tape to the threads to prevent leaks. A well-prepared workspace is key to a smooth P Trap replacement.
Finally, after installing the new P Trap, a thorough leak test is indispensable. Fill the sink with water and let it drain while you check for any signs of leakage under the sink. If everything remains dry, you’ve successfully completed your P Trap replacement. This final step confirms the effectiveness of your work, bringing peace of mind and a sense of accomplishment. With the right tools, materials, and approach, maintaining a leak-free sink in your home becomes an achievable task.
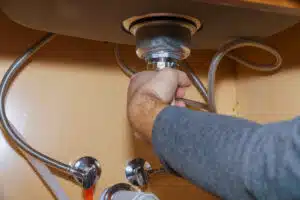
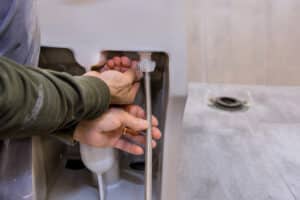
Removing the Old P Trap Step by Step
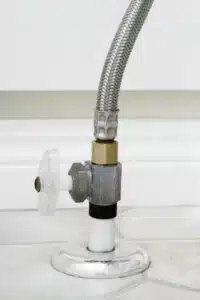
Starting the P Trap replacement process begins with shutting off the water supply to prevent any unexpected spills. This step is crucial and ensures a dry workspace, making the removal of the old P Trap easier and safer. Homeowners in San Diego, CA, will find this precautionary measure saves a lot of cleanup time. Once the water is off, place a bucket under the sink to catch any remaining drips.
Next, use a wrench to loosen the slip nuts connecting the old P Trap to the sink’s drain and the waste pipe. It’s important to proceed with care to avoid damaging the pipes. Sometimes, these nuts can be tight, so applying a bit of force may be necessary. However, if they’re too resistant, applying some penetrating oil can help loosen them without causing harm.
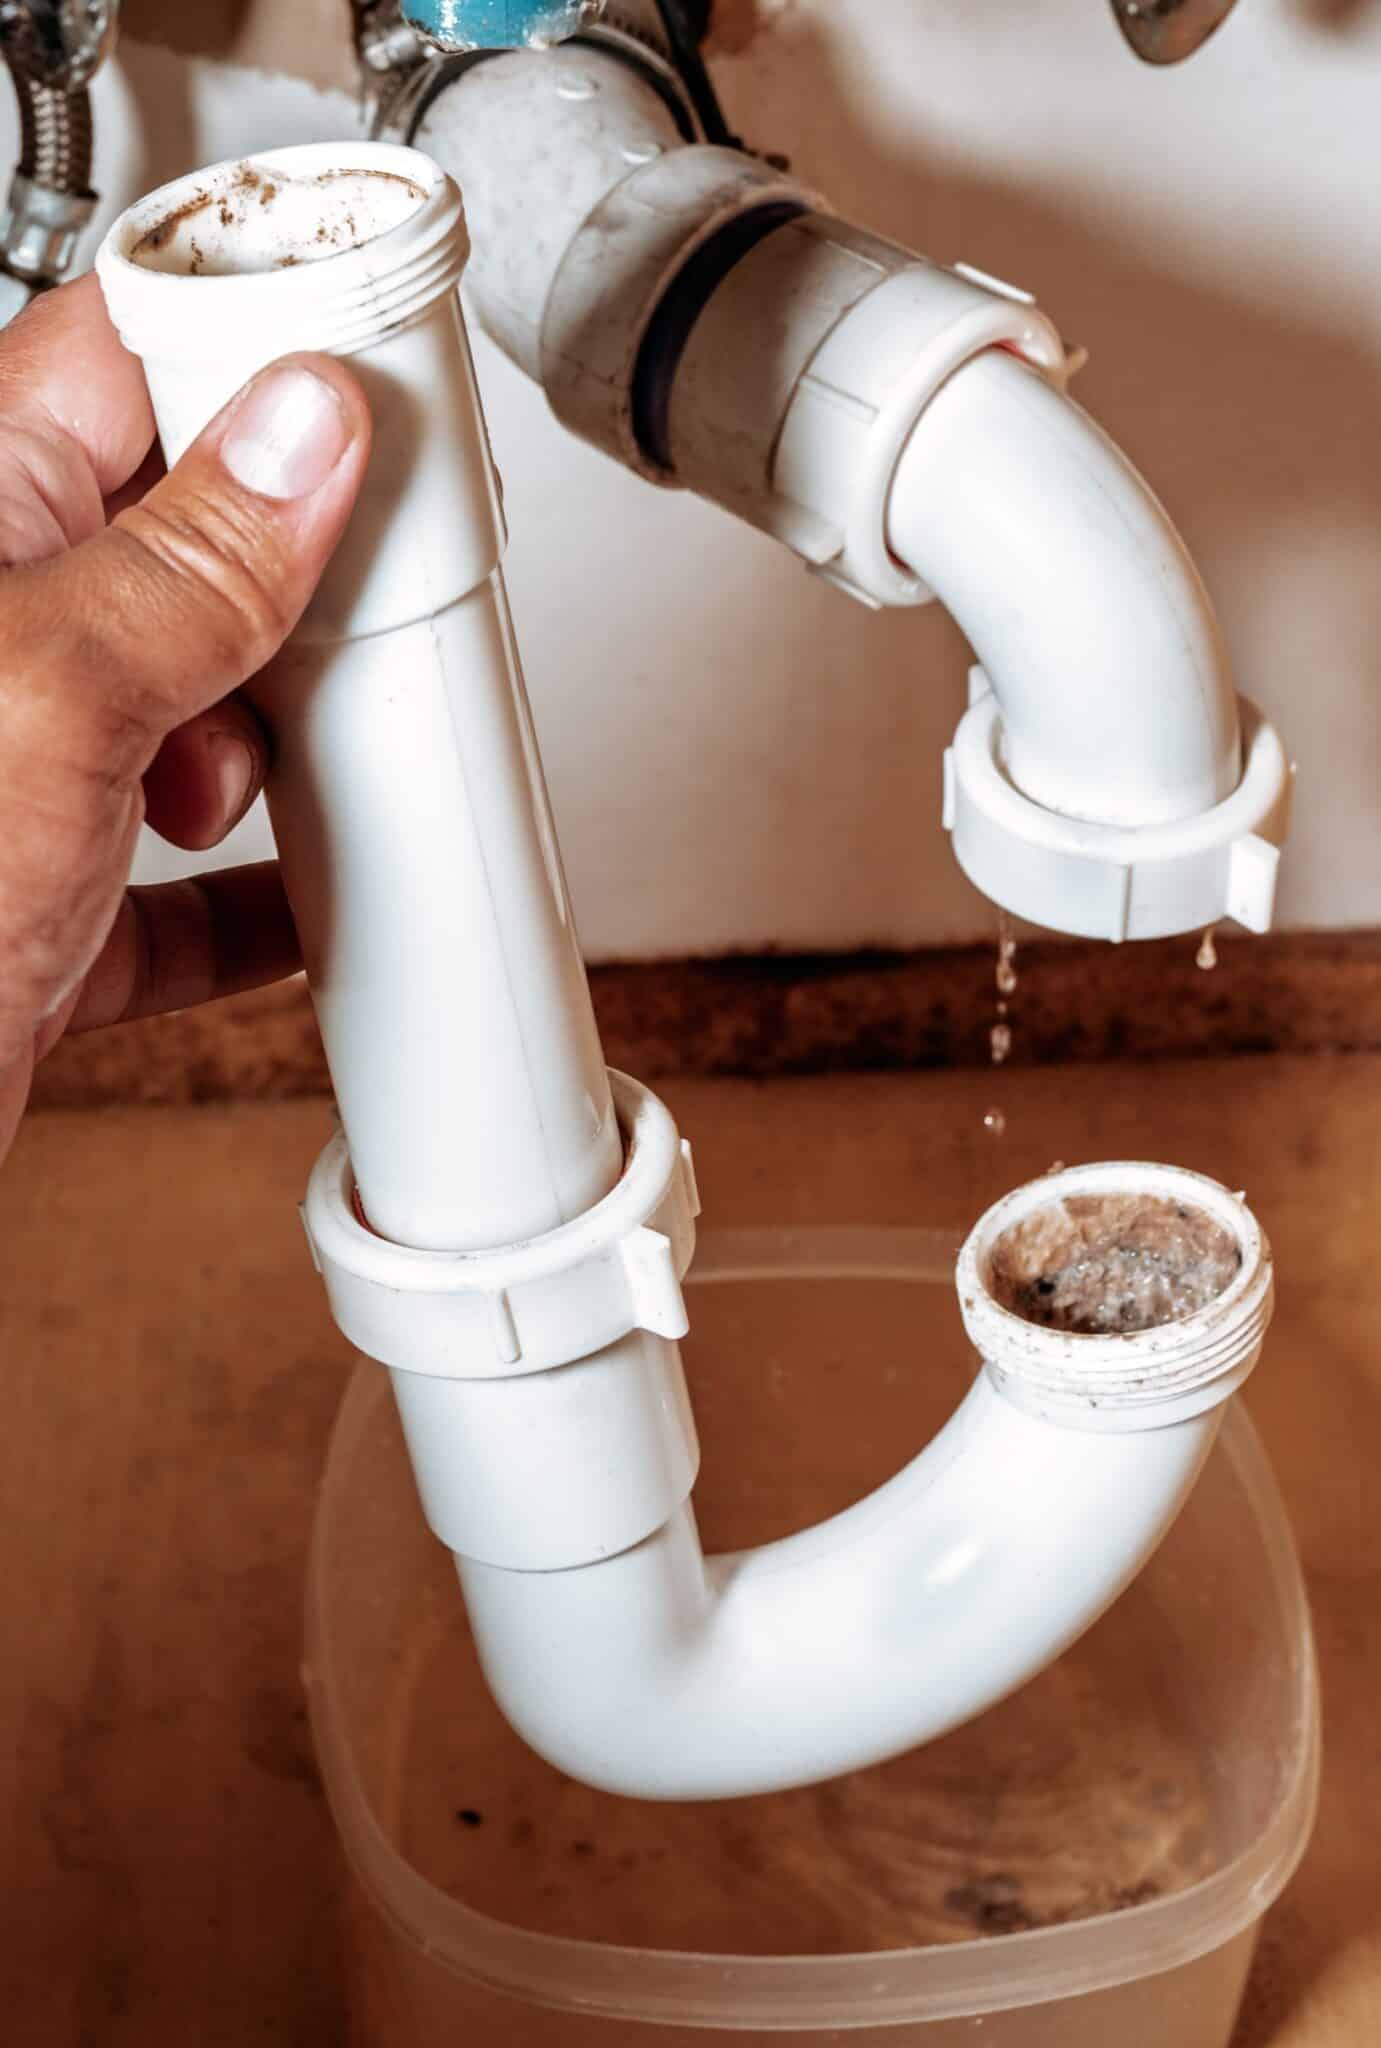
After the slip nuts are loosened, you can remove the old P Trap by hand. This step allows for a visual inspection of the trap and the pipes for any further damage or wear. Residents of La Jolla, CA, should take this opportunity to clean the area around the pipes, preparing it for the new P Trap installation. Removing debris and buildup ensures a clean seal and a better fit for the new components.
Finally, with the old P Trap removed, it’s essential to compare it with the new one to ensure a perfect match. Checking the size and shape against the old P Trap confirms that the replacement will fit seamlessly into your plumbing system. This comparison prevents the hassle of discovering size discrepancies mid-installation, paving the way for a smooth and efficient P Trap replacement process.

How to Choose the Right Size P Trap
Choosing the right size P Trap for your replacement project is a crucial step that should not be overlooked. In San Diego, CA, homeowners must ensure that the new P Trap matches the dimensions of the old one precisely. This involves taking accurate measurements of both the diameter and the length of the pipes. Doing so guarantees a snug fit and eliminates the risk of leaks, making your P Trap replacement a success.
When shopping for a new P Trap, it’s important to consider the material it’s made from. In La Jolla, CA, for example, the choice between PVC and metal P Traps can depend on the existing plumbing setup. PVC is popular for its ease of installation and resistance to corrosion, while metal is valued for its durability. Selecting a material that is compatible with your plumbing ensures a long-lasting repair.
Aligning the new P Trap with your plumbing system requires attention to detail. Make sure that the slip joints are properly aligned with the sink’s drain and the waste pipe. This step is crucial for creating a watertight seal and preventing future leaks. A correctly aligned P Trap not only functions efficiently but also contributes to the overall health of your plumbing system.
Finally, conducting a thorough inspection of the new P Trap before installation can save time and effort. Check for any defects or damage that might compromise its performance. This proactive approach helps avoid the frustration of discovering issues after the installation is complete. By ensuring the quality and fit of your new P Trap, you can enjoy a leak-free sink and peace of mind.
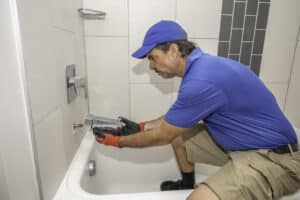
Aligning and Connecting the New P Trap
After choosing the right size and material for your P Trap replacement, the next step is aligning and connecting the new P Trap under your sink. This involves carefully positioning the P Trap to ensure it aligns perfectly with the sink’s drain and the waste pipe. In San Diego, CA, homeowners understand the importance of this precision. A well-aligned P Trap prevents leaks and ensures smooth water flow, contributing to an efficient plumbing system.
When connecting the new P Trap, start by attaching the slip nuts to the sink’s drain and the waste pipe by hand. Avoid using tools at this initial stage to prevent damaging the threads. This method allows for adjustments as needed to achieve the best alignment. Residents of La Jolla, CA, appreciate this careful approach, knowing that a secure fit is crucial for a leak-free connection.
Next, tighten the slip nuts with a wrench, but be mindful not to over-tighten. Applying just the right amount of force ensures a snug fit without risking damage to the P Trap or pipes. This balance is key to a successful P Trap replacement, ensuring everything stays in place without any stress on the components. It’s a simple yet effective way to safeguard against leaks under your sink.
Finally, after securing the P Trap, it’s essential to check your work. Gently tug on the P Trap to make sure it’s firmly attached and won’t easily come loose. This last step verifies the stability of your installation, giving you confidence in your P Trap replacement. With everything aligned and connected properly, you can look forward to a leak-free sink and a well-maintained plumbing system in your home.
Tightening Techniques to Prevent Leaks
After securing the new P Trap in place, the next crucial step in P Trap replacement is applying the right tightening techniques. In San Diego, CA, homeowners know that a leak-free sink depends on how well the slip nuts are tightened. Start by hand-tightening these nuts to ensure they’re snug but not overdone. This approach allows for a secure fit without damaging the threads, setting the stage for a durable connection.
Using a wrench, gently tighten the slip nuts a quarter turn past hand tight. This method ensures that everything is securely fastened without applying excessive force that could compromise the integrity of the P Trap. It’s a delicate balance that residents of La Jolla, CA, master to maintain their plumbing systems effectively. Remember, the goal is to achieve a leak-proof seal, not to stress the materials.
To avoid common pitfalls in P Trap replacement, refrain from over-tightening. Exerting too much force can lead to cracked pipes or damaged P Traps, which would only create more problems. Instead, focus on achieving a firm yet gentle grip. This technique protects your plumbing components, ensuring a successful installation without the risk of leaks.
Finally, conducting a second leak test after tightening is essential. Fill the sink and let the water drain while you inspect the connections under the sink for any signs of moisture. If everything remains dry, you’ve successfully completed your P Trap replacement. This final step confirms the effectiveness of your tightening techniques, giving you peace of mind and a fully functional sink.
Performing a Leak Test After P Trap Replacement
After tightening the slip nuts, performing a leak test is the final step in the P Trap replacement process. Fill the sink with water, then let it drain while carefully observing the connections under the sink for any signs of moisture. This method is crucial for homeowners in San Diego, CA, ensuring their efforts have resulted in a leak-free sink. If no leaks are detected, the P Trap replacement has been successful, offering a sense of accomplishment and relief.
In some cases, a small drip might be noticed during the leak test, indicating a need for slight adjustments. Residents of La Jolla, CA, should not be discouraged by this. Instead, slightly tighten the slip nuts or reposition the P Trap as needed. This iterative approach allows for fine-tuning the installation, ensuring a watertight seal is achieved without resorting to excessive force.
It’s important to remember that a leak test after a P Trap replacement isn’t just about checking for immediate leaks. It also serves as a preventive measure, helping to avoid future plumbing issues. By taking the time to perform this test, homeowners can ensure their plumbing remains in top condition, saving time and money down the line. This proactive step is a testament to the effectiveness of thorough P Trap replacement work.
Lastly, should any leaks persist after adjustments, it may indicate a more complex issue. In such instances, it might be beneficial to consult with a professional. This doesn’t reflect poorly on the homeowner’s effort but rather underscores the complexity of plumbing systems. Taking this step ensures the longevity and functionality of your home’s plumbing, maintaining a leak-free environment under your sink.
Tips for Maintaining Your Sink’s P Trap
Successfully completing a P Trap replacement marks a significant achievement in maintaining your home’s plumbing health. However, the journey doesn’t end here. Regular checks and minor adjustments can extend the life of your P Trap, ensuring it continues to function efficiently. Homeowners in San Diego, CA, find that periodic monitoring helps catch potential issues before they escalate into bigger problems.
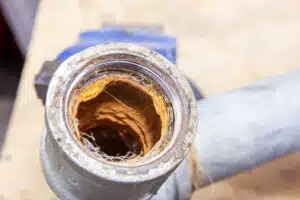
One practical tip is to clean the P Trap regularly to prevent clogs and buildup, which can lead to leaks. By simply loosening the slip nuts and removing the trap, you can clear out debris and rinse the interior. This preventive measure is especially beneficial for residents in La Jolla, CA, where water quality can contribute to faster accumulation of sediments. Reassembling it correctly afterwards ensures everything remains leak-free.
Another useful practice is to avoid pouring grease or oil down the sink, as these can solidify within the P Trap, causing blockages. Instead, dispose of such substances in the trash. This habit not only protects your P Trap but also contributes to the overall health of your plumbing system. It’s a simple yet effective strategy to minimize the need for frequent replacements.
Lastly, if you notice slow drainage or an unusual odor coming from your sink, it might be time to inspect your P Trap. These signs can indicate a partial blockage or the need for a replacement. Taking action early can prevent more serious issues, ensuring your plumbing remains in top condition. By following these maintenance tips, you’ll enjoy the benefits of a well-functioning P Trap and avoid the inconvenience of unexpected plumbing repairs.
Frequently Asked Questions
What tools are needed for P Trap Replacement?
For a smooth P trap replacement, you’ll need a few basic tools. Start with a pair of channel-lock pliers or a wrench for loosening and tightening connections. A bucket or a towel comes in handy to catch any water that spills. Lastly, ensure you have Teflon tape to secure a leak-free seal on threaded joints. These tools will help you tackle the job efficiently and effectively.
How do you ensure a leak-free installation?
Ensuring a leak-free P trap replacement starts with carefully removing the old parts. Match the new P trap to the old one’s size to guarantee a perfect fit. When aligning the slip joints, make sure they are straight and snug. Finally, tighten all connections firmly but gently to prevent any leaks, checking your work with a leak test.
Can I replace a P Trap by myself?
Yes, you can tackle a P trap replacement on your own with some basic tools and a bit of know-how. First, gather the necessary tools and make sure you turn off the water supply to avoid any spills. Follow the steps carefully, ensuring each connection is snug and leak-free. With patience and attention to detail, you’ll successfully complete the job without the need for professional help.
What are common mistakes to avoid?
When doing a P trap replacement, a common mistake is not checking the size compatibility between the new and old parts. Another error includes over-tightening the connections, which can lead to cracked fittings. Skipping the leak test after installation is also a misstep that can result in water damage. Lastly, failing to align the slip joints properly can cause leaks, so always ensure they are straight and secure.
How often should P Trap Replacement occur?
A P trap replacement isn’t needed on a regular schedule but should be done when signs of wear or leaks appear. Typically, this means checking it during routine plumbing maintenance or if you notice slow drainage. It’s wise to inspect it annually to catch any issues early. Remember, a timely replacement can prevent bigger plumbing problems down the line.